Motorola Bionic Lapdock
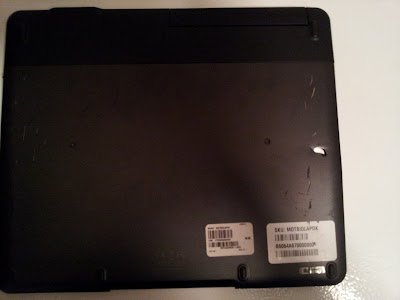
I received my Motorola Bionic Lapdock today, and I was greeted by a small disappointment, which you can see pictured below. There are numerous gouges on the bottom of the lapdock, as well as one major puncture mark (shiny silver spot mid-right). I haven't received all of my adapter cables to hook the Pi up to the lapdock yet, so I can't test the functionality of the screen, but I was able to confirm that the lapdock's battery is charging while plugged into the wall.
On the bright side, the top of the lapdock looks much better, and it fits almost perfectly in the dash compartment of my Ford Fusion that I was planning to use as a mounting platform for the lapdock. All I need to do is remove the compartment cover, and then I will be able to open the lapdock's screen fully. The lapdock will also sit about 1.5 inches further back without the compartment cover in place, so it won't be hanging over the vents like it is in the pictures below.
Raspberry Pi!
I also received my Raspberry Pi! The Pi's tiny size is simply incredible when you see it first-hand. The pictures really don't do it justice! I promptly took a trip to town to get an SD card in order to get a test environment up and running on the Pi.

After loading the Raspbian "Wheezy" image onto my newly acquired 8GB SD card using Win32DiskImager, I promptly assembled all the necessary cables for a test boot of the Pi. The top micro-usb cable is providing power to the Pi, while the left HDMI cable is sending the Pi's video output to an HDTV. The bottom USB cables are the keyboard and mouse, while the bottom-left yellow cable is providing a network connection to the Pi.
This first boot of "Wheezy" opened the raspi-config utility from the terminal, and from there I was able to set Pi to boot to the Raspbian desktop by default. After choosing this option the Pi rebooted itself, and then I was greeted with this lovely desktop:
I'm looking forward to testing through the lapdock instead of my HDTV, as well as starting work on the voice-control portion of this project, which will be utilizing pocketsphinx and custom python code for controlling the Pi with voice commands.


No comments:
Post a Comment